In this tutorial, we cover one of the methods used by artists for creating stencil art on skateboards. This process can be used on many different canvases, but as always our focus is on skateboard applications.

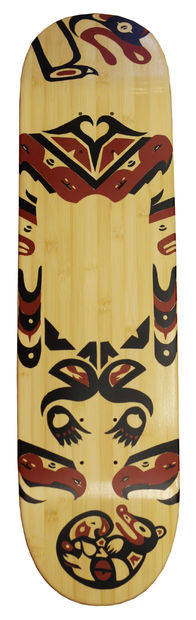
Before you start: It is a good idea to have the entire board graphic laid out on a template that you can use for reference. You can see that for this particular board, the artist has done a full scale mock up that will be used to determine which colours need to be removed for each step of stenciling.
Materials Needed
Tools Needed
Skateboard (or any canvas)
Masking Tape
Spray Paint
Pencil, Pen or Marker
Sharp Utility Knife
Eraser
Step 1: Stencil 1st Colour
The first step is to cover the entire skateboard in masking tape.
Pick one colour that you want to apply first to the board. It is a good idea to start with the most predominant colour... in this case, black.


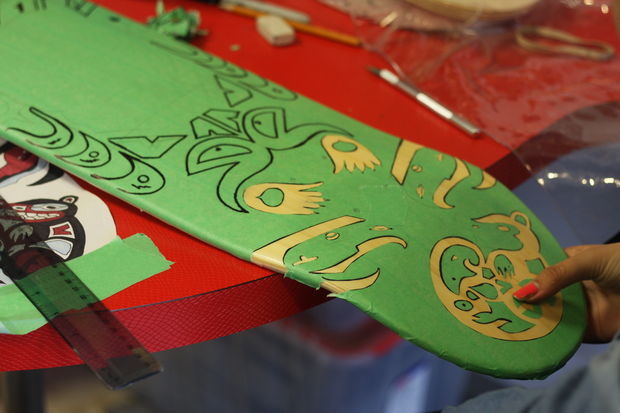
Draw the outlines of all areas you want to paint black, and then cut out those areas with a sharp utility knife. What this does is creates a stencil that will allow you to apply one colour of paint to the whole board, while masking off the areas that are different colours.
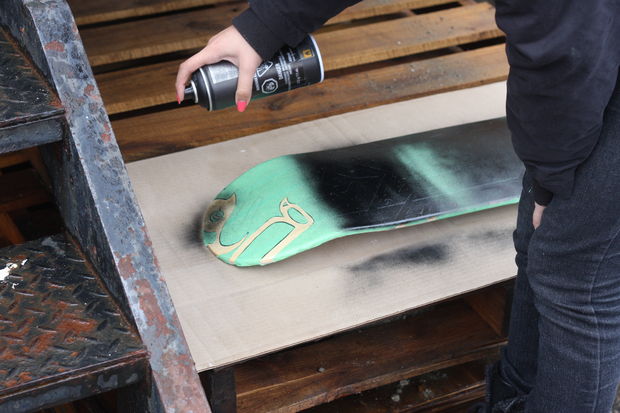
Once you have all the areas cut out, you can apply the paint. This can be done by brush or spray can.
**Note - if you are spraying, make sure to do so in a well ventilated area.


Step 2: Removing the tape

Once the first colour has been applied and left to dry, you can remove the masking tape. The dry time will depend on what kind of paint you are using, so make sure to read the label of your specific product.

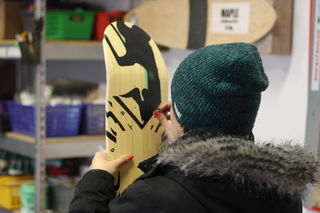

Depending on how detailed your stencil is, you may have small pieces of tape that need to be picked off before starting your next layer.
If you are having difficulties removing the small pieces of tape, try using the utility knife to help lift a corner to get it started.
Step 3: Apply 2nd Colour Stencil
You can now re-tape your board and start drawing the outlines of your second colour.
This is the same as the first step, except some colours may overlap each other depending on your design.


Once you cut out all of the areas of tape for your second colour, you are ready to apply the paint.


Step 4: Paint and Repeat
Apply enough paint to the areas of the board you want covered with your second colour.
If you have additional colours and layers that you want to apply, after the drying time, repeat the previous steps.
Once this has dried, you can remove the masking tape and admire your two colour board.